
Cool! You bought the Original CV Puller and
want to learn more. Here's more!
|

|
|
PREFERRED CV Axle Removal Procedure
|
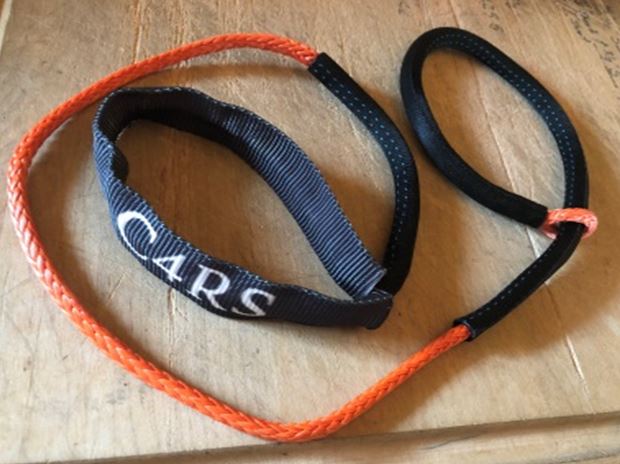
Step 1: Open your CV Puller. You should see a CV Puller that looks like picture #1. Inspect your CV Puller for any damage & familiarize yourself with its construction, operation & safety requirements prior to use.
|
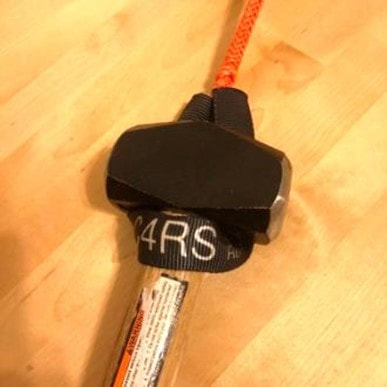
Picture 1. What your CV puller should look like.
|
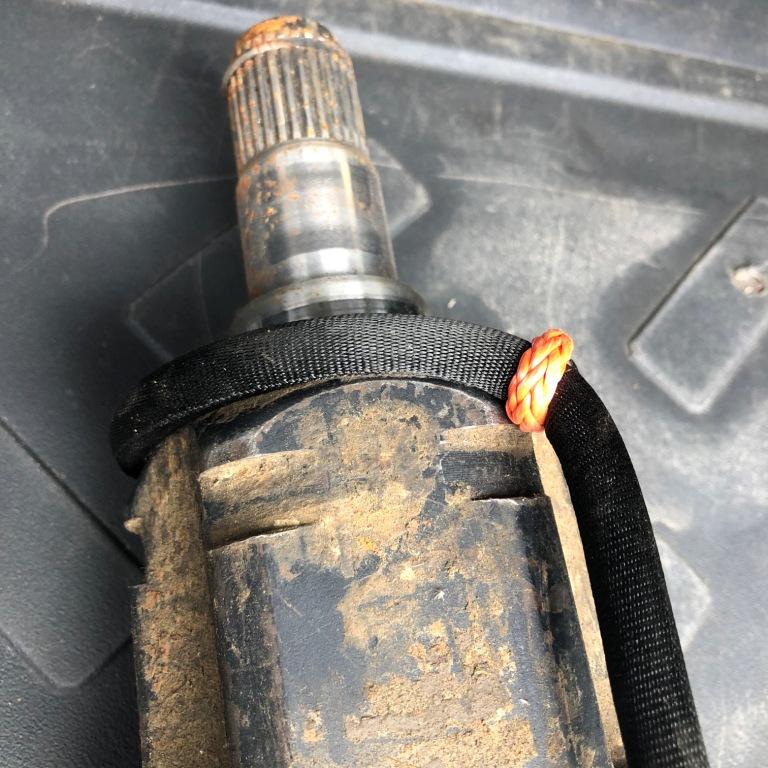
Step 2: Wearing all appropriate PPE (personal protective equipment) tighten the adjustable CV puller loop around the appropriate spot of the inner CV axle, picture #2. Position the thinner movable abrasion guard as seen in picture #2. The best place to attach is to the recessed area on the cup in picture #2 as long as this area does not have any rough or sharp edges. Make sure this loop is secured tightly around the CV axle so it does NOT slip off. Use heavy duty tape if necessary to make sure this loop does NOT slip off. If this loop slips off injury or damage could occur.
Step 3: Pictures #3 & 4 show where the CV puller could attach to the CV axle but these are improper & could lead to CV Puller slippage &/or failure.
Step 3: Pictures #3 & 4 show where the CV puller could attach to the CV axle but these are improper & could lead to CV Puller slippage &/or failure.
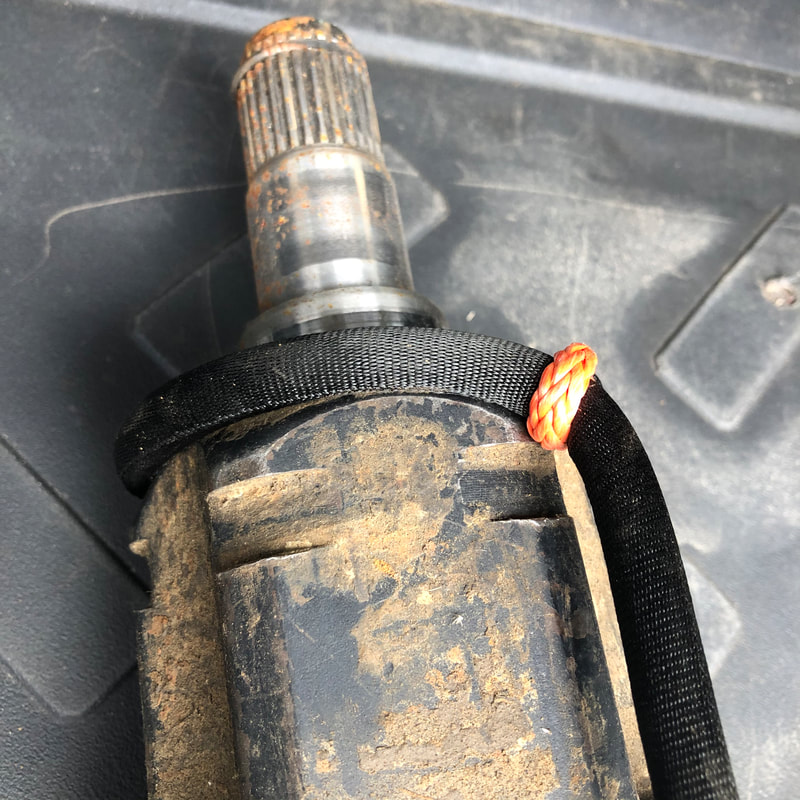
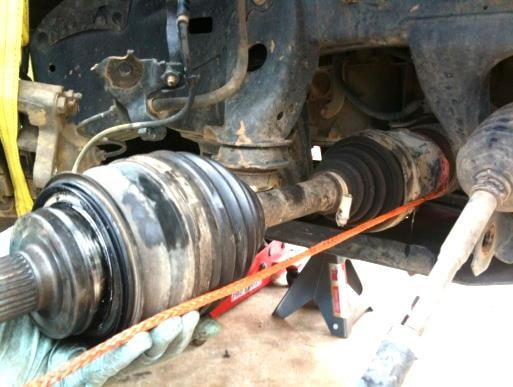
Picture 2. This is the preferred way. Do this. This is good as long as there are no sharp edges.
|
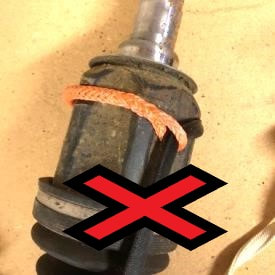
Picture 3. DON'T DO THIS.
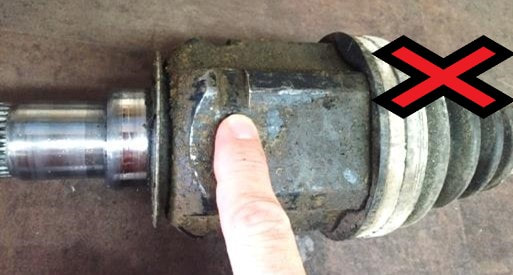
Picture 4. Don't attach here. Don't do this.
|
|
Step 4; Do not attach behind the dust shield (picture #5) as the CV puller could be cut on the dust shield where the finger is pointing. Keep your CV puller from coming into contact with any edges where it could be cut, especially when under tension
|

Picture 5. This is a no also. Don't do this. This could cut your CV puller and that wouldn't be good.
|
|
Step 5: Place a hammer through the fixed larger loop with the black abrasion guard as seen in picture #6. Make sure the hammer does NOT slip out of the loop. If the hammer slips injury could occur. Heavy gloves in your ‘hammer hand’ are strongly advised past this step.
|
Picture 6. Do this, but for Pete's sake, be careful. Don't let the hammer slip. Wear heavy gloves.
|
|
Step 6. Pull the CV puller taught with the hammer, pictures #6 & 7. Double check that the loop has not slipped off the CV axle or shifted.
|
Picture 7. Do this. Check the loop has not slipped. Be careful. Wear gloves. Leave the beer for later.
|
|
Step 7. Cradle the CV axle with your hand & arm as necessary (pictures #7 & 8) so when it pulls out of the differential the CV axle does not fall to the ground causing damage.
|
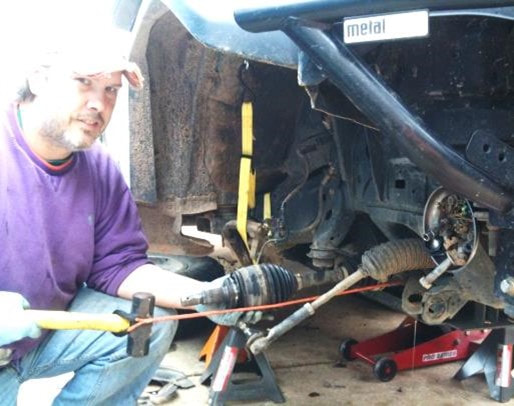
Picture 8. Do this. But read all of our cautions first and be careful.
|
MAKE SURE THAT EVERYONE IS WELL CLEAR OF THE CV AXLE BEFORE YOU START THE FOLLOWING STEP TO ‘POP’ THE AXLE OUT. IF THE CV PULLER LOOPS COME LOOSE, YOUR HAMMER BREAKS, OR ANYTHING SIMILAR HAPPENS YOU OR BYSTANDERS COULD BE INJURED
Step 8. Pull with the hammer to ‘pop’ the CV axle out of the differential. Note that the CV Puller will not stretch much (hence the use of heavy gloves). You will probably have to ‘pop’ the CV axle a few times using additional force each time to make the CV axle come out of the differential. We recommend pulling twice on one side, then rotate the CV puller 90-180 degrees on the CV axle without rotating the CV axle, & then pulling again. Repeat process as necessary. If this does not work try rotating the CV axle between pulls. Most CV axles will either easily release without much work, or will absolutely not want to come out which is typically caused by the c retaining clip not releasing properly. Also, some newer vehicles’ CV axles seem to be much tougher to release. If you are having difficulty with the CV axle releasing then seek professional assistance. Be careful as you can pull diff/axle bearings out of the diff if the c clip does not release.
C4RS DISCLAIMS ANY & ALL LIABILITY & RESPONSIBILITY FOR ANY INJURY, DAMAGE, OR LOSS TO PERSON OR PROPERTY THAT MAY OCCUR WHEN USING A PRODUCT SOLD BY C4RS. VEHICLE RECOVERY & REPAIR INVOLVES EXTREME LOADS & CAN RESULT IN INJURY & DEATH. SEEK PROFESSIONAL INSTRUCTION & INSTALLATION.
CUSTOM 4WD RECOVERY SYSTEMS (C4RS) RECOMMENDS PROFESSIONAL INSTALLATION FOR ALL PRODUCTS WE SELL & DISCLAIMS ANY & ALL LIABILITY & RESPONSIBILITY FOR ANY INJURY, DAMAGE OR LOSS TO PERSON OR PROPERTY THAT MAY OCCUR WHEN USING ANY PRODUCT SOLD BY C4RS. WORKING ON A VEHICLE INVOLVES EXTREME LOADS & CAN RESULT IN INJURY & DEATH. PRODUCTS ARE SOLD FOR OFF ROAD USE ONLY. NOT FOR LIFTING OR LIFE SAVING.